I've been officially accepted onto Gamer Camp Nano!
It starts on the 2nd July and I really can't wait. I've handed in my notice at work, sorted through all my belongings (as I'm also moving house after the camp is finished) and got myself into a bit of a stupor over all the free time I'm going to have for art again.
Oh man.
Art art art.
It's really going to be great. I'll be a part of a small team of artists and programmers, working together to make a game to be put on the Apple App store.
We're going to be using, it seems, both Adobe Photoshop and 3DSMax. Now, 3DSMax is a lovely piece of software that I've owned for a few years now, but nothing's really given me the drive to get my head down and, well, learn how to use the damn thing.
Once I found out I'd be needing it for the course? Well...
First attempt, a wooden head:
Second attempt, a wild west outdoor scene:
Third attempt, a wild west saloon:
Complete with glass cabinets!
So overall, yes, I'm pretty damn excitable about all-things-game-art and I can't wait to rub-shoulders with the other participants in Gamer Camp this year!
Also, I here-by promise to keep up with this as a daily art blog again for the duration of Gamer Camp.
Tune in again on the 2nd July 2012 to follow my craaazy adventures in the gaming industry!
Wednesday, 13 June 2012
Wednesday, 1 February 2012
..and I'm a material girl
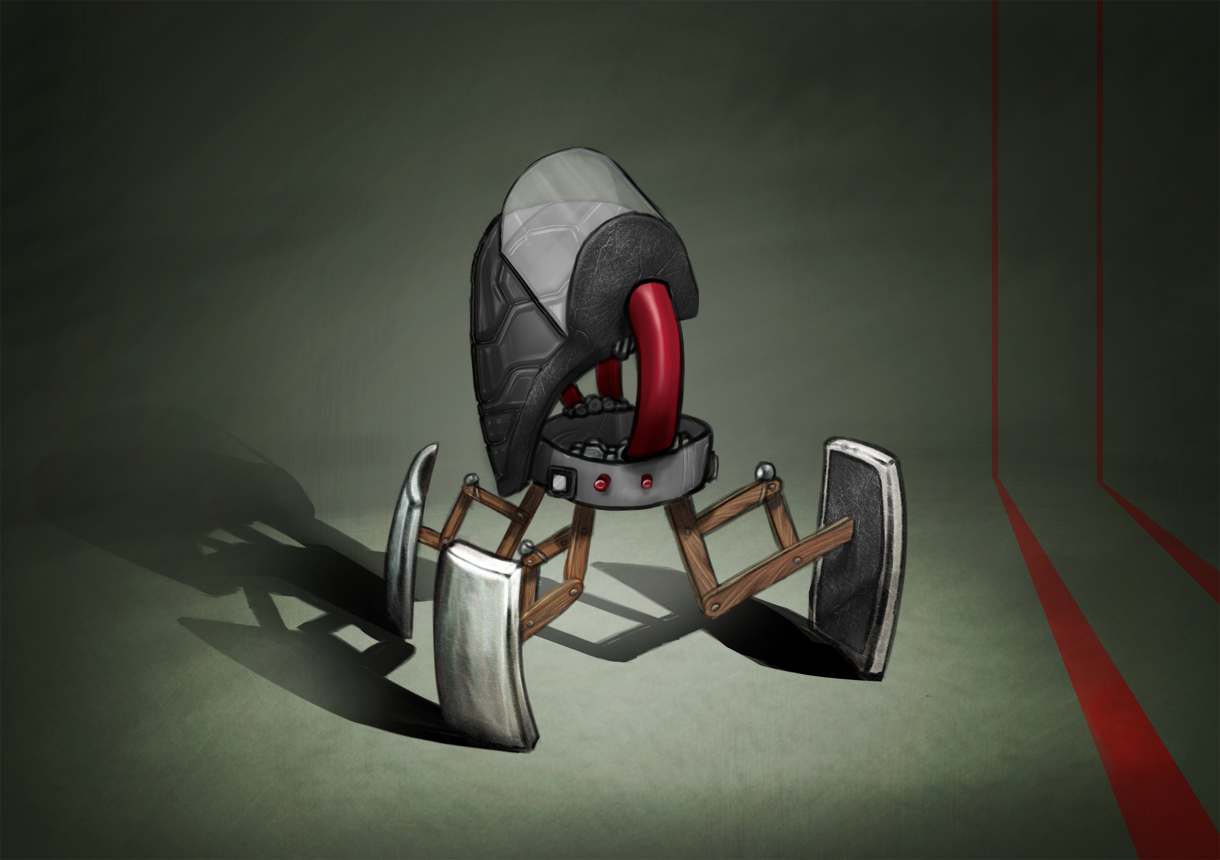
Thanks to the recent material studies I've been partaking in, I've been able to create an amalgamation of the materials studied (with the added bonus of red plastic tubing) and flesh out one of the robots I created in the previous post!
There's also the added bonus of wood in this image, which I did the following study for:
Which has been my favorite study so far! Even through I used a different type of wood (closer to maple) for the robot legs.
Interesting note: The robot legs would actually work. The metallic balls at the top of each leg are magnetic and the larger magnets on the body of the robot can be triggered on/of and, when on, positive/negative so it creates a quick push-pull of the upper joints. These joints force the lower bend in the leg tense and lax and push the leg in and out.
There's also the added bonus of wood in this image, which I did the following study for:
Which has been my favorite study so far! Even through I used a different type of wood (closer to maple) for the robot legs.
Interesting note: The robot legs would actually work. The metallic balls at the top of each leg are magnetic and the larger magnets on the body of the robot can be triggered on/of and, when on, positive/negative so it creates a quick push-pull of the upper joints. These joints force the lower bend in the leg tense and lax and push the leg in and out.
Labels:
Picture Included
Sunday, 29 January 2012
Rapid Prototyping and You
So, I learned this cool technique for rapid prototyping in concept art recently. It's pretty fundamental but hey, I've not used it before!
Basically, you create quick component pieces of what you want to create. Legs, arms, heads, basic body shapes, accessories, etc. It works well for cars, aliens, animals..anything really, but when I first heard the idea, robots seemed like the best fit for an initial try!
As such, I created the above, a selection of 'ROBOT PARTS', as I've so mysteriously named. It's a pretty safe set that didn't take me very long to mock up. The important things to remember here are:
a. We're focusing on the profile of the image
b. Shapes should fit together ~relatively~ well with little editing.
From here it was pretty easy to mock up some initial robot designs:
I've obviously added some small features to individual ones here, hanging wires, lights and the like, but overall almost all elements are available in the initial spec.
And I strongly believe that if I'd just tasked myself with creating 4 robots from scratch, I wouldn't of created anything so detailed with such funky outlines, and definitely not so quickly!
Basically, you create quick component pieces of what you want to create. Legs, arms, heads, basic body shapes, accessories, etc. It works well for cars, aliens, animals..anything really, but when I first heard the idea, robots seemed like the best fit for an initial try!
As such, I created the above, a selection of 'ROBOT PARTS', as I've so mysteriously named. It's a pretty safe set that didn't take me very long to mock up. The important things to remember here are:
a. We're focusing on the profile of the image
b. Shapes should fit together ~relatively~ well with little editing.
From here it was pretty easy to mock up some initial robot designs:
I've obviously added some small features to individual ones here, hanging wires, lights and the like, but overall almost all elements are available in the initial spec.
And I strongly believe that if I'd just tasked myself with creating 4 robots from scratch, I wouldn't of created anything so detailed with such funky outlines, and definitely not so quickly!
Labels:
Guides,
Picture Included
Saturday, 28 January 2012
Go on, touch it!
Would appear I was suffering for artist's block again recently. Usually I try to sketch it out, creating rough shapes and seeing what I can turn it into, or doing circle practice (drawing rough circles with my wrist, then elbow, and finally shoulder).
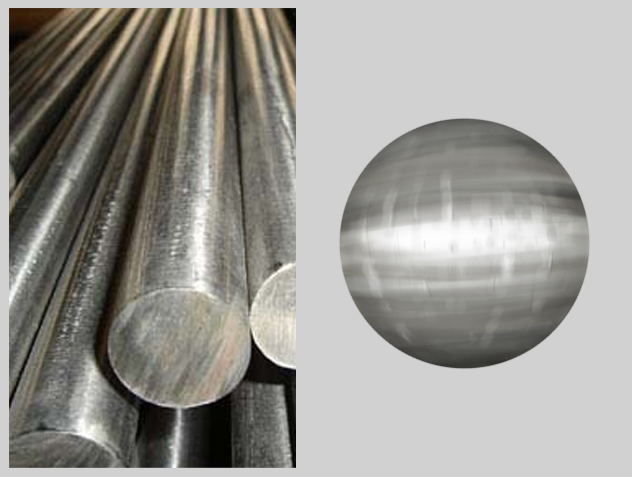
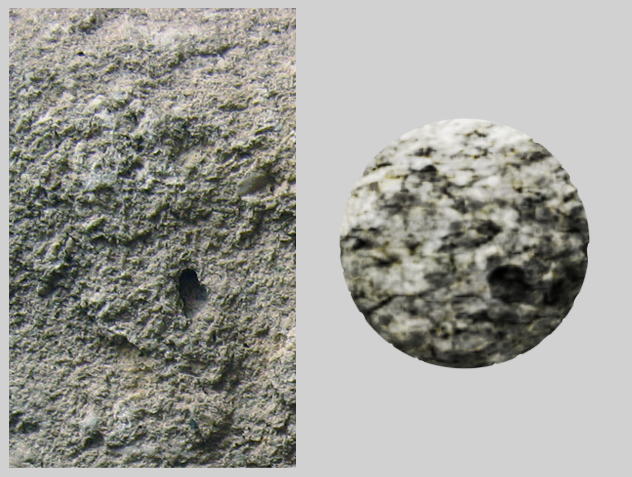
It felt like none of these were working for me, so, to avoid the mental block that creativity was imposing on me, I decided to partake in some material studies, and here are the results!
Leather
Steel
Rock

Rather happy with it, and while you can't see it from here, there's also a loft indoors with a ladder leading up and a bed.
Always entertaining to learn how to use a new piece of software!
It felt like none of these were working for me, so, to avoid the mental block that creativity was imposing on me, I decided to partake in some material studies, and here are the results!
Leather
Steel
Rock
The originals are, of course, on the left while my spherical interpretations are on the right.
Both attempting to mimic a material while attempting to turn it into an unnatural shape was damn good practice, but still made me feel like I hadn't achieved enough.
So I made a house with a cool pool in Sketch-Up.
Rather happy with it, and while you can't see it from here, there's also a loft indoors with a ladder leading up and a bed.
Always entertaining to learn how to use a new piece of software!
Labels:
Picture Included
Friday, 4 November 2011
League of Legends : The Breakdown
A breakdown of many of the major themes, items and buildings in League of Legends
(General gameplay, not character specific)
TURRET DATA
Turrets do more damage with each successful hit on each single target, increasing by +22.5% each hit after the first with a cap of +135%
Damage to turrets with your basic attacks is worked out at basic damage + either 100% of your bonus damage or 40% of your bonus ability power, whichever is highest
If there are no enemy minions in range, a turret gains approx. 49% physical damage reduction and 29% magic damage reduction
Inner turrets are invulnerable till the outer turrets are destroyed
Turrets do more damage as the game progresses
- Outer turrets take 8 minutes to reach a maximum damage, with a minimum of 152 AD and a maximum of 200 AD
- Inner turrets take 11 minutes to reach a maximum damage, with a minimum of 197 AD and a maximum of 263 AD
- Inhibitor turrets take 20 minutes to reach a maximum damage, with a minimum of 201 AD and a maximum of 330 AD
- Nexus turrets take 38 minutes to reach a maximum damage, with a minimum of 115 AD and a maximum of 343 AD
If you have around +25 bonus damage you can happily steal the last hit
Turret priorities go in the order of: Enemy champion who's attacked allied champion -> Pets -> Minions -> Enemy champion
The turret will only change targets once it's current target is killed UNLESS it sees an enemy champion attack an allied champion.
TELEPORTING
You can teleport to:
- Friendly turrets
- Friendly minions
- Friendly pets
- Sight Ward and Vision Ward, though this will reveal the ward to enemies (unless in fog of war)
- Flags (Rally / Demacian Standard)
- Teemo's Noxious Mushrooms
- Shaco's Jack in the Box
- Friendly copies (Shaco's Hallucinate, Mordekaiser's Child of the Grave)
- Non-destructable traps (Caitlyn's Yordle Snap Trap, Nidalee's Bushwhack)
- Friendly inhibitors
If a minion is being teleported to, it becomes invulnerable (and won't move/attack) during the duration
Teleporting to a turret does NOT make it invulnerable, and if it is destroyed you will still teleport there
Teleporting particles can be seen through brush
MINIONS
Begin spawning 1min 30s into the game, and then spawn every 30s
Grow stronger every 3mins
Deal 50% more damage to turrets than to champions and other minions
There are currently 5 minions types: Melee, Caster, Siege, Super and Anti-Turret
Melee and Caster are the basic types of minion, the amount they give on death grows by +1g after the first wave and +1g every 5 minutes after that
On the Twisted Treeline, they give 29g (melee) and 22g (caster) each initially, while on Summoner's Rift they give 22g (melee) and 16g (caster)
The siege minion gives 36g initially on Twister Treeline, and 27g initially on Summoner's Rift, growing by +1g every 2-3 minutes
Siege minions will also spawn once per 3 waves for the first 20 minutes, then once per 2 waves afterwards
Melee, Caster and Anti-Turret minions take 100% tower damage, while Siege and Super minions only take 50%
If all inhibitors are destroyed, 2 super minions will spawn in each lane per wave
Minions have the unique ability of Call For Help, this is a behaviour based ability which bucks the trend of their otherwise simple follow-route, kill routine
Minion priorities based on Call For Help are as follows:
- Allied champion attacked by enemy champion
- Allied champion attacked by enemy minion
- Allied minion attacked by enemy minion
- Allied minion attacked by enemy turret
- Allied minion attacked by Enemy champion
- Closest enemy minion
- Closest enemy champion
E.g. If it's simply attacking the closest enemy minion, and an allied champion is attacked by an enemy champion, all near-by allied minions will begin attacking the enemy champion. However, minions only re-evaluate their situations every few seconds, unless their current target dies or becomes unavailable (walks into brush)
BUFFS
(Unfortunately I'll be ignoring Dominion for this section)
Summoner's Rift buffs include:
- Blessing of the Lizard Elder (Red Buff)
- Crest of the Ancient Golem (Blue Buff)
- Exalted with Baron Nashor
- Blessing of the Lizard Elder (Red Buff)
- Crest of Crushing Wrath (Brown)
- Crest of Flowing Water (Grey)
- Crest of Nature's Fury (Green)
Crushing Wrath and Exalted with Baron Nasher are of interest in that they are both non-transferable. If it's owner is killed, the buff is lost
Crest of Crushing Wrath: This unit deals % increased damage
Crest of Flowing Water: Increases movement speed by 30%
Crest of Nature's Fury: Increases attack speed by 20% and reduces cooldowns by 10%
Blessing of the Lizard Elder: The unit's physical attacks slow the target's movement speed by (10/20/30)% (at levels 1/6/11) and deal (7.7 + Level * 2.35) true damage. This buff's monster spawns at 2:10 and respawns every 4mins. It lasts 2mins 30s
Crest of the Ancient Golem: This unit regens 1.5% mana (or energy) per second and has (16 + Level * 0.5)% cooldown reduction on their abilities. This buff's monster spawns at 1:55 and respawns every 5mins. It lasts 2mins 30s
Exalted with Baron Nashor: This unit gains 40 ability power, 40 attack damage, 3% of max health regen per 5s, 1% of max mana regen per 5s. This buff's monster spawns at 15:00 and respawns every 7mins. It lasts 4mins
Exalted with Baron Nashor is unique in that the buff is given to every living player on the team, regardless of participation in killing Baron Nashor. It is also the only buff not affected by Utility Mastery
ITEMS
Items are split into 5 categories: Consumable / Basic Tier / Advanced Tier / Legendary Tier and Removed.
Boots of Speed is the only basic item which grants a unique passive
Only 1 pair of boots will increase your movement speed. If 2 pairs are in your inventory, the highest movement speed will be used. Other affects on boots, including unique passives, still take affect
Ninja Tabi is the only item that grants dodge chance
There are 19 primary effects and 3 categories of secondary effects.
Primary effects:
Ability Power, Armor, Armor Penetration, Attack Speed, Cooldown Reduction, Critical Strike, Dodge, Health, Health Regeneration, Life Steal, Magic Penetration, Magic Resistance, Mana, Mana Regeneration, Movement Speed, On-Hit Effects, Spell Vamp and Tenacity.
Secondary effect categories are Active, Aura and Passive.
That's all for today! I hope you find this of some use to you - Krillatron
Labels:
breakdown,
game,
gaming,
league of legends
Tuesday, 1 November 2011
Fabric Practice
Nothing too spectacular for today I'm afraid, I just wanted to get some fabric practice done, and what better than a faux-fur hooded robe with gold seams, as worn my the summoners in League of Legends?
On the League of Legends note, I've now put quite a lot of time into Singed, Anivia, Teemo and Sivir, and have to say, I'm liking Teemo the most! Being able to out-Teemo other Teemo's is damnable fun, as well as littering Dominion with mushroom to slow the speed ups and negate the health points.
Hint for tomorrow: More fur of a different variety!
Labels:
Picture Included
Thursday, 27 October 2011
Teal Waters
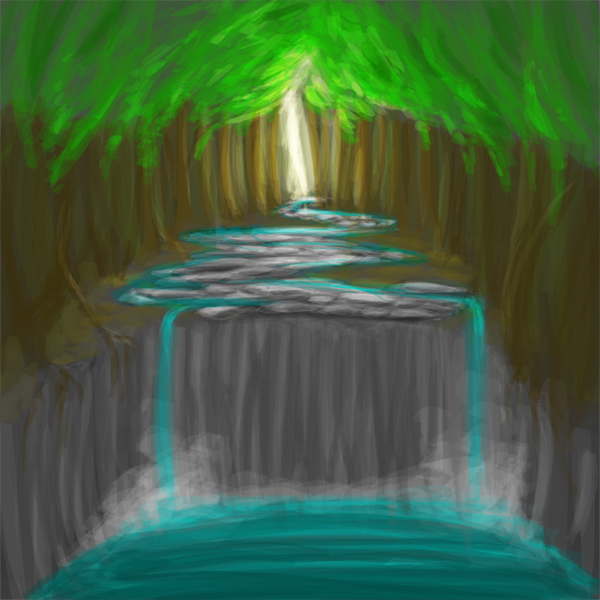
Feels like I havn't done a fantasy landscape in a while, so decided to churn out a mini fantasy scene.
I've been really enjoying drawing water recently, though am aware I need to work a bit more on the lighting and currents of it, particularly in a scene like this!
I'm pleased with the general shape of this piece, with the water-surrounded path leading to the sudden drop, however feel the perspective of the shot and lack of a height-comparable object, the sizes all feel a little odd. The stones making up the path are meant to be rather large, with the water on both sides of the path being close to a stream, however they feel as if they should be pebbles, making the trees feel miniature.
I really should of just used smaller stones in general to keep the sizes feeling correct, but hey, art's all a learning process!
I've been really enjoying drawing water recently, though am aware I need to work a bit more on the lighting and currents of it, particularly in a scene like this!
I'm pleased with the general shape of this piece, with the water-surrounded path leading to the sudden drop, however feel the perspective of the shot and lack of a height-comparable object, the sizes all feel a little odd. The stones making up the path are meant to be rather large, with the water on both sides of the path being close to a stream, however they feel as if they should be pebbles, making the trees feel miniature.
I really should of just used smaller stones in general to keep the sizes feeling correct, but hey, art's all a learning process!
Labels:
Picture Included
Subscribe to:
Posts (Atom)